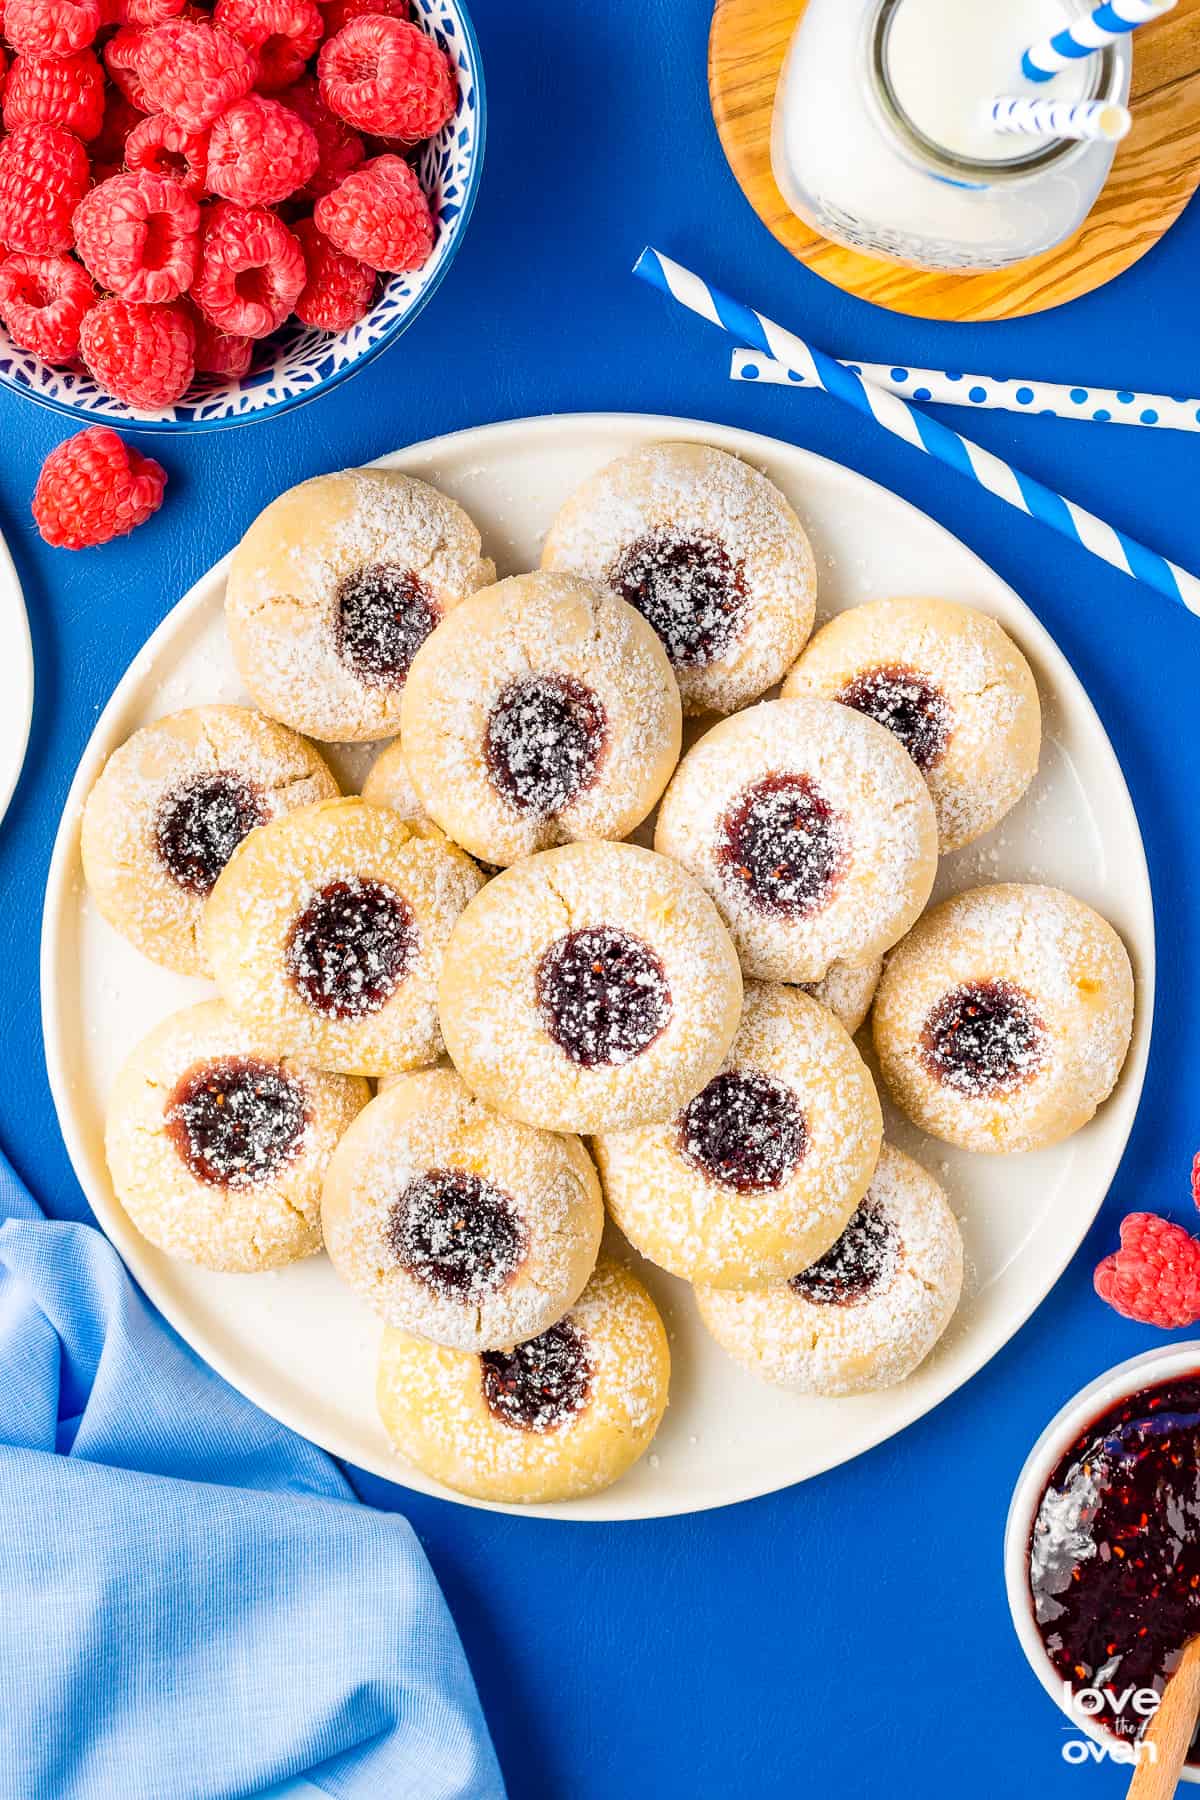
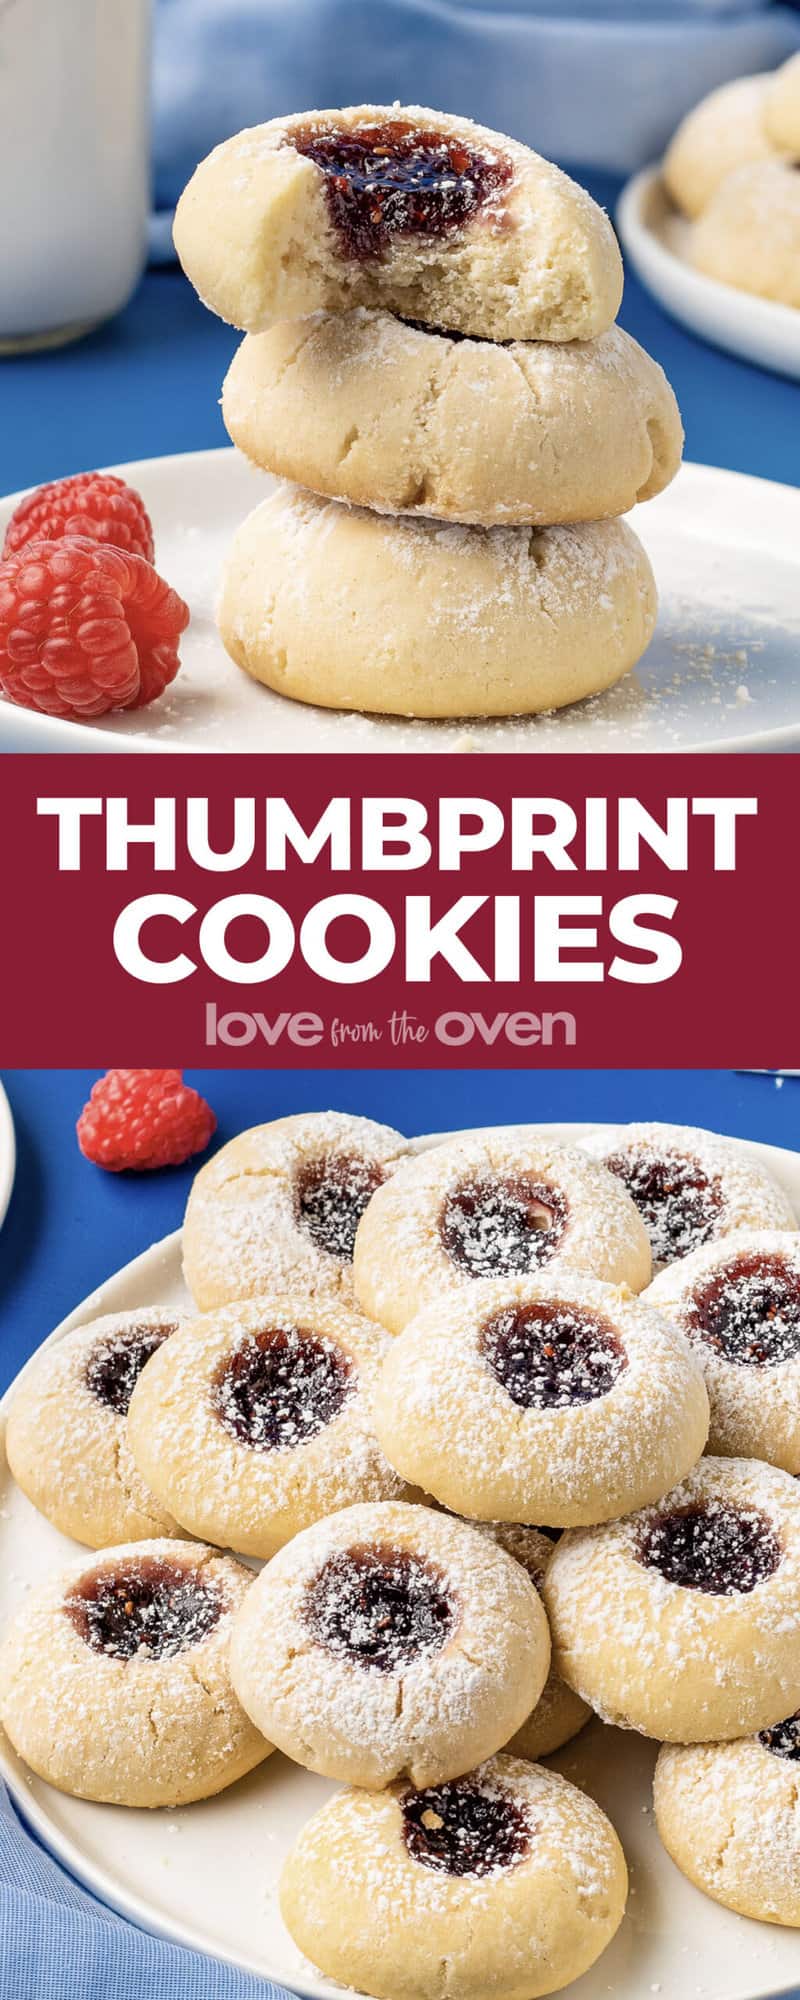
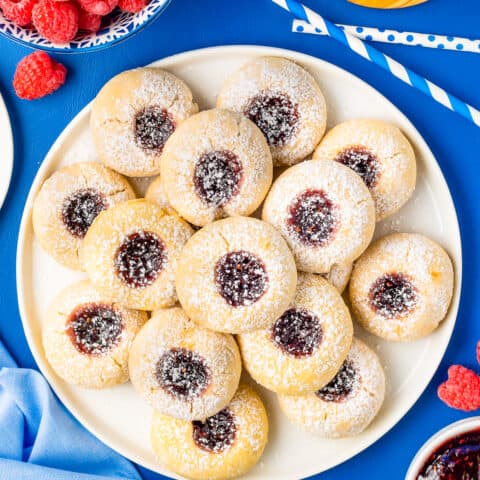
Raspberry Thumbprint Cookies are deliciously sweet, with just the right hint of tart, and super simple to make! With just 6 easy ingredients, you can whip up a batch of these faster than you can say Raspberry Thumbprint Cookies. Make these classic confections for potlucks, a bake sale, or just to enjoy on a lovely afternoon with a cup of tea or coffee.
Want To Save This Recipe For Later?
Reasons You’ll Love Thumbprint Cookies
Raspberry Preserves – If you love jam-filled treats you’re gonna love these simple cookies with a sweet surprise in the middle.
Small and Delicious – These little cookies are the perfect size, and you don’t need to convince yourself to have just *one* more.
Eggless Dessert – Raspberry Thumbprint Cookies are great for certain dietary restrictions, and the ingredients are still super simple.
Customizable – The great thing about these cookies is that you don’t have to use raspberry jam. You could use strawberry, peach, apricot, or anything you have on hand!

These cookies are classic, adorable, and just dang good. Like shovel them in your mouth as fast as possible good. It doesn’t help that these cookies are bite-sized either, because they seem to disappear from the dessert table twice as fast!
Ingredients and Substitutions
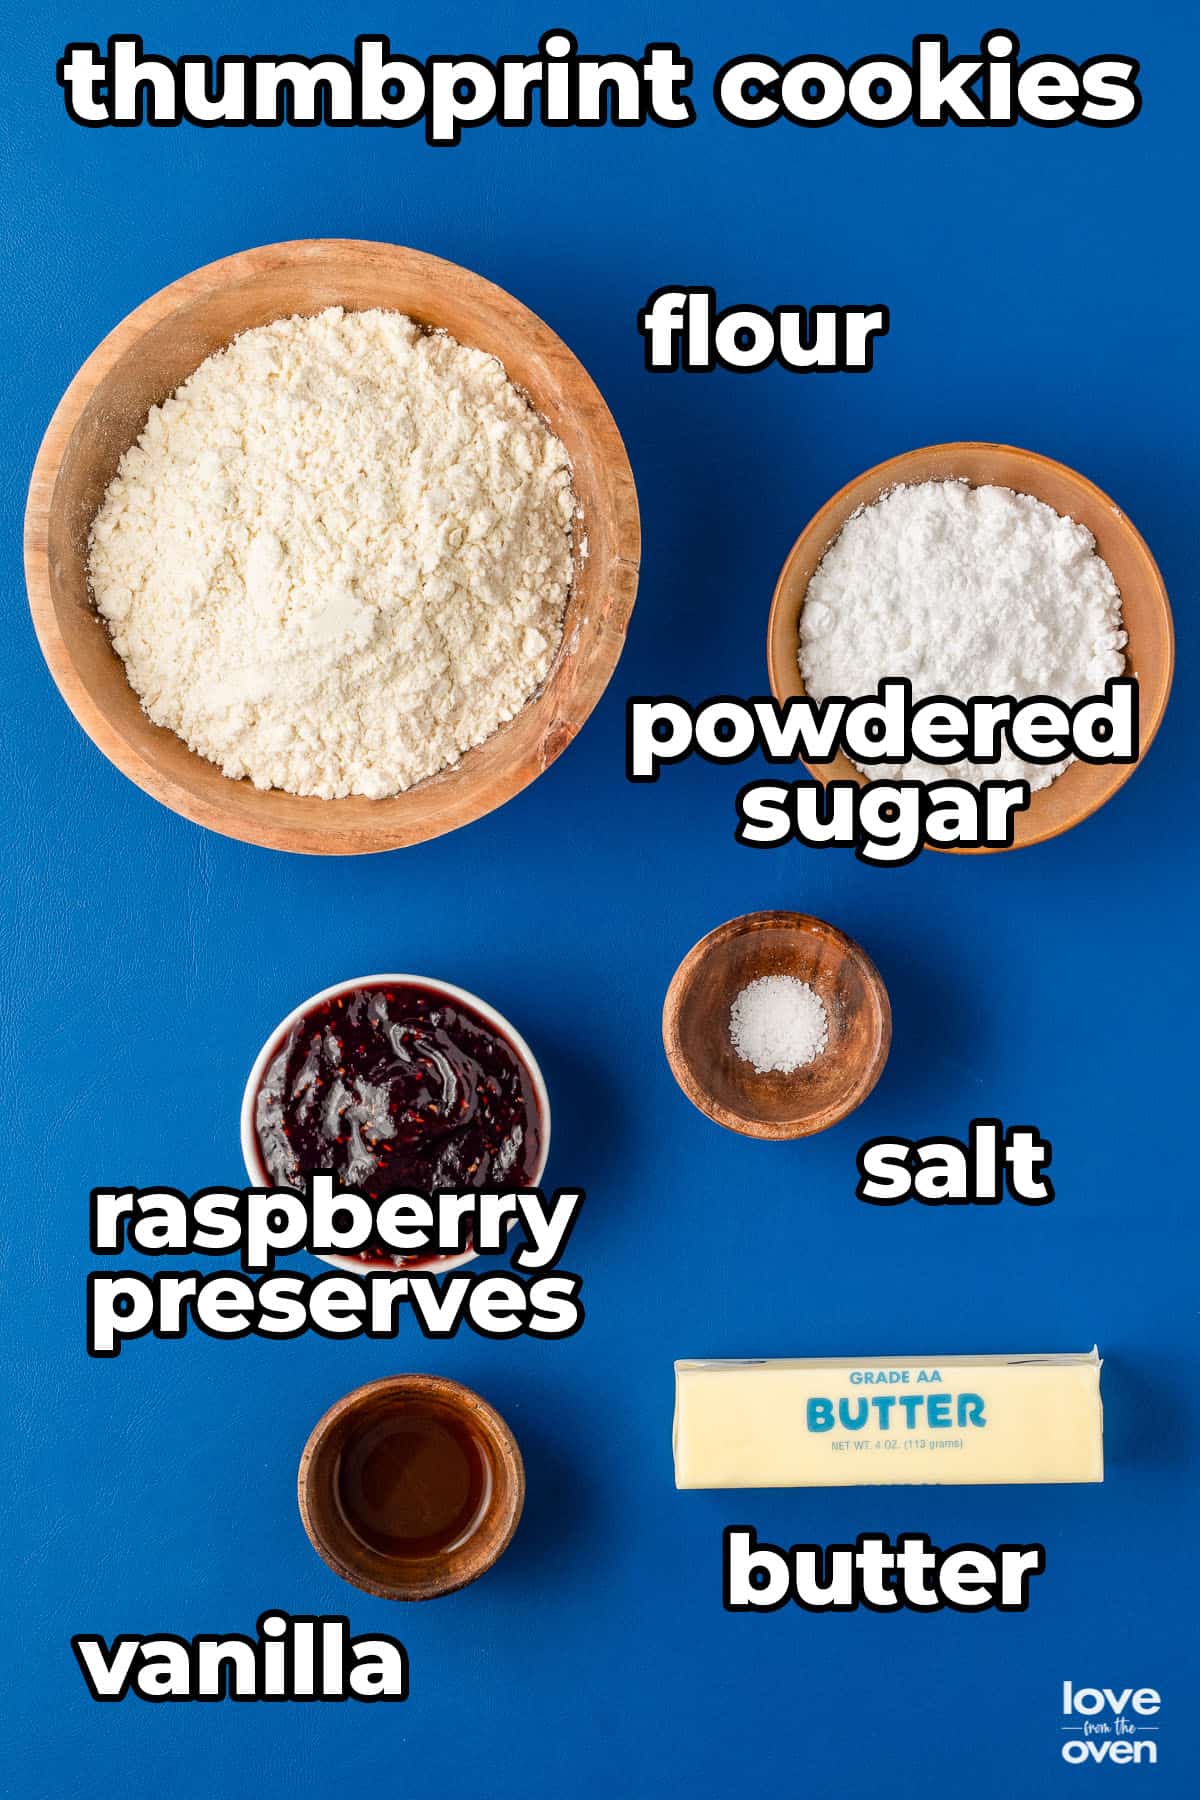
- Flour – All purpose flour works best for this recipe.
- Powdered Sugar – When combined with the butter, this will ensure that the thumbprint cookies are soft and chewy. I don’t recommend substituting for a different kind of sugar.
- Raspberry Preserves – Don’t get me wrong, raspberry preserves pair great with the shortbread cookies. However, you can use any preserves you like! Good alternatives are peach, strawberry, cherry, pineapple, or apricot!
- Butter – Make sure the butter is fully softened before using it in this recipe.
- Vanilla – Vanilla extract or flavoring will work just fine.
- Salt – adds an extra level of flavor, and keeps the cookies from being overly sweet.
How To Make Thumbprint Cookies
- Grab a baking sheet and line it with parchment paper or a silicone mat. In a large bowl, add softened butter and powdered sugar. Using a hand or stand mixer, beat the butter together with the sugar on a high speed until it’s light and soft. This should take about 2-3 minutes, don’t rush through this part.
- Once light and fluffy, scrape the sides of your bowl then add your vanilla extract and salt. Switch to a medium speed, then gently add the flour to the dough until it is just combined. The dough should be fairly sticky but still firm. Form the dough into a ball, cover, and let it chill in the fridge for 30-60 minutes.
- When the dough is ready, preheat your oven to 325° and position your rack in the middle of the oven. Scoop out a few tablespoons of dough and roll them into about 1 inch balls. Place the dough balls onto the lined baking tray, spaced out evenly.
- Using the handle end of a wooden spatula, or your finger, make a well in the center of each cookie dough ball. Make sure it’s deep, but don’t poke a hole all the way through. You also don’t want the well to be too wide.
- To each cookie well, add a generous amount of raspberry preserves. You can use a small spoon to do this or a piping bag if it’s easier.
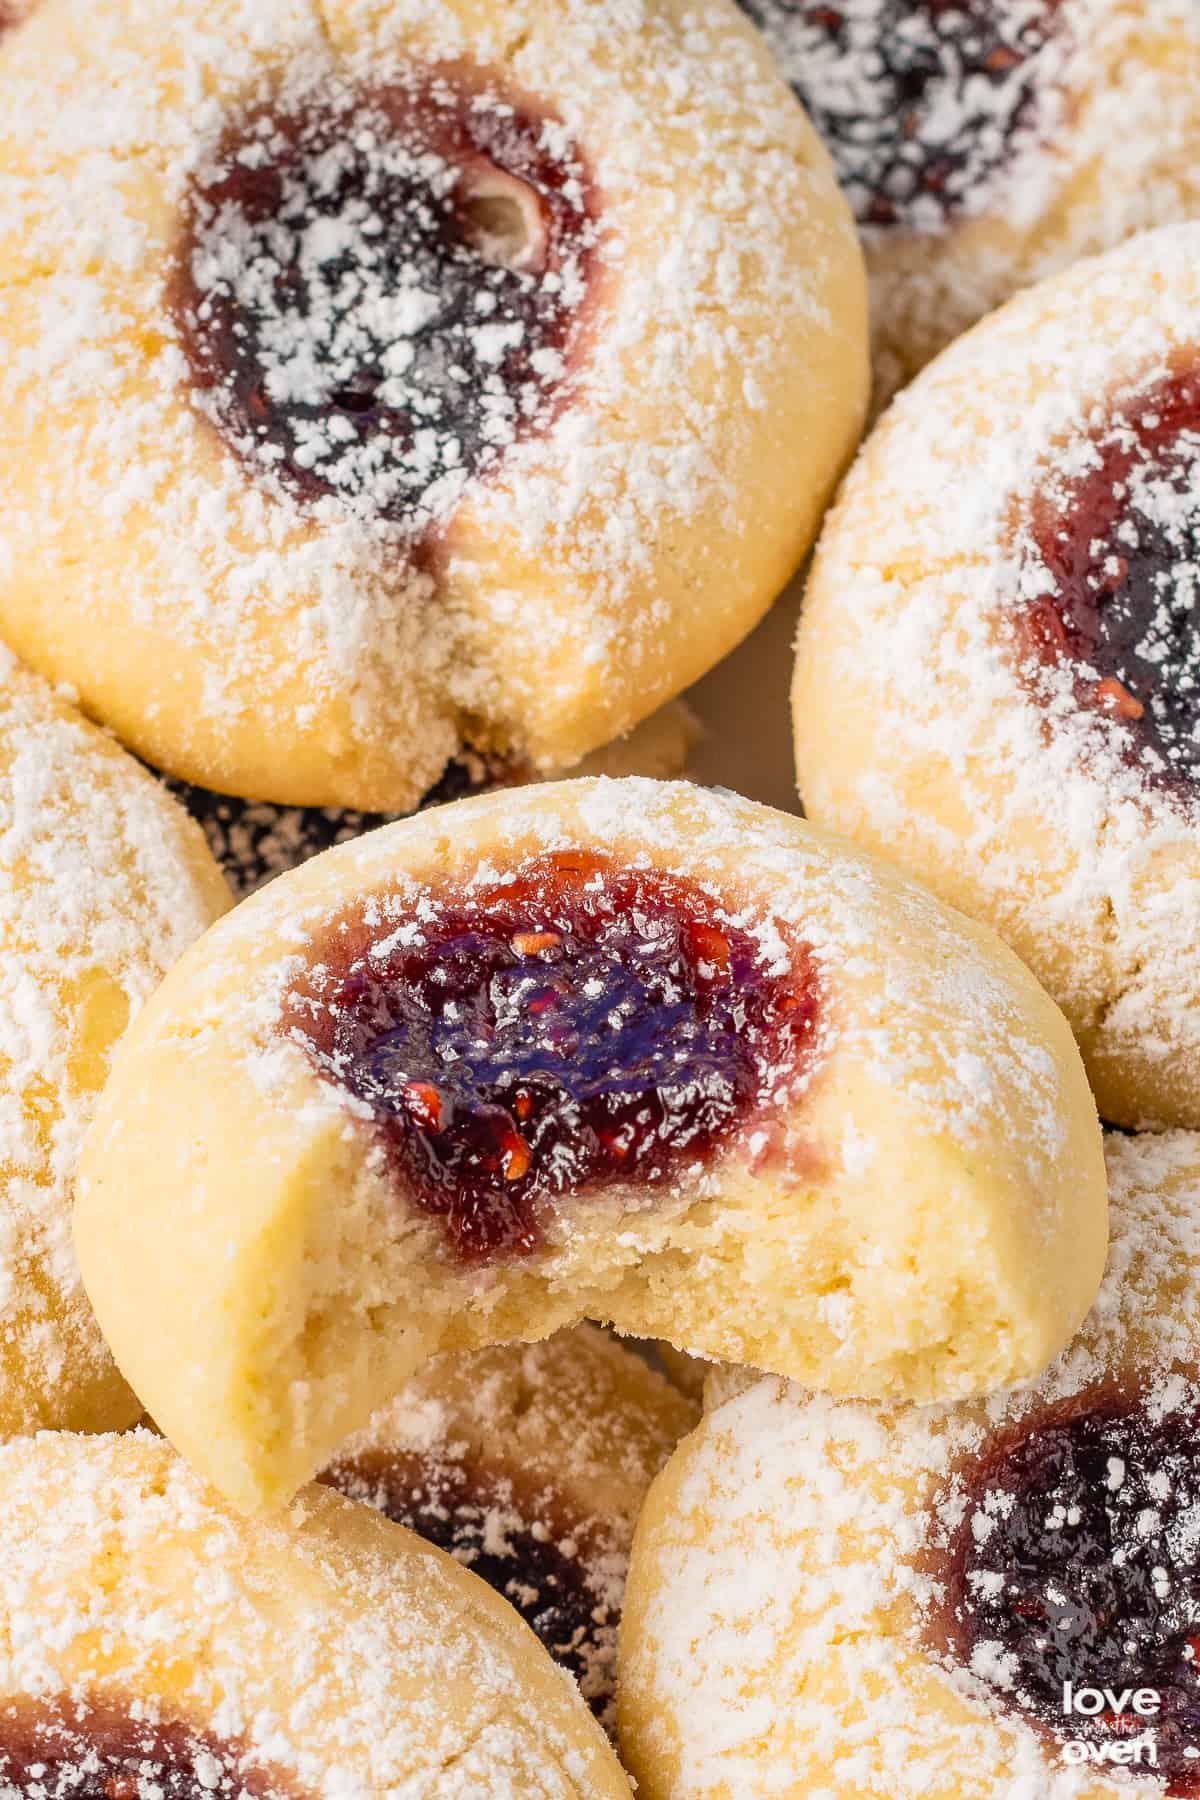
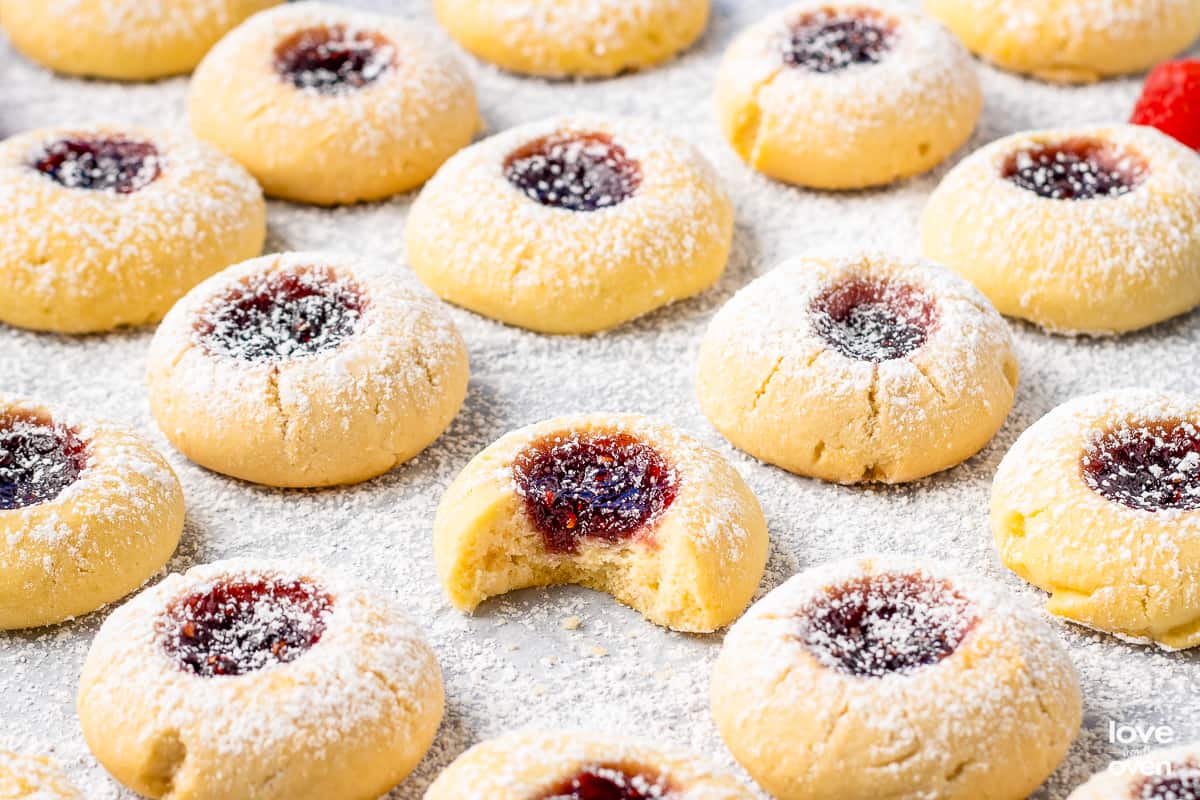
- Bake the jam-filled cookies for about 20-25 minutes or until they’re golden brown, and they’ve puffed up. Let the cookies cool on the baking tray for 5 minutes before transferring them to a cooling rack to cool completely. Once they’re completely cooled, you can add an extra dusting of powdered sugar to the cookies if you’d like. Serve, and enjoy!

Recipe Tips and Advice
Storage – Store these thumbprint cookies in an airtight container at room temperature for about 3-4 days.
Equipment – For this recipe you’ll need a baking tray, parchment paper or a silicone mat, a mixing bowl, a hand or stand electric mixer, a spatula, a wooden spoon, and an optional piping bag.
Crispy Cookies
These cookies are not really meant to turn a brown color because they are shortbread. If you want more color on the tops of your cookies, you can bake them on the upper middle rack of your oven. This will also create a more crispy cookie.
Recipe FAQs
This could be because you didn’t let the dough chill in the fridge, or the butter you used was either way too soft, or melted.
Yes, as long as you refrigerate it for at least 30 minutes, it can stay in the fridge for longer.

More Cookie Recipes To Try
Loved these thumbprint cookies? Well, theres more where that came from. Check out a bunch of these delicious cookie recipes!
- Linzer Cookies
- Raspberry Crumble Cookies
- White Chocolate Raspberry Cookies
- Cranberry Bliss Bars
- Best Christmas Cookie Recipes
- Shortbread Cookies
- Holiday Sugar Cookies
- Cut Out Sugar Cookie Recipes
- Orange Cranberry Cookies
- Pecan Sandies
Thumbprint Cookies
Ingredients
- 1 cup unsalted butter (softened)
- 1/2 cup powdered sugar
- 2 teaspoons pure vanilla extract (could also use almond extract)
- 1/8 teaspoon salt
- 2 cups all-purpose flour
- 1/2 cup thick raspberry preserves
Instructions
- Prepare baking sheets by lining with parchment paper or silicone mats.
- In a large bowl, add softened butter and powdered sugar. Using a hand or stand mixer, beat the butter together with the sugar on a high speed until it’s light and soft, approximately 2-3 minutes.
- Once light and fluffy, scrape the sides of your bowl then add your vanilla extract and salt. Switch to a medium speed, then gently add the flour to the dough until it is just combined. The dough should be fairly sticky but still firm.
- Form the dough into a ball, cover, and let it chill in the fridge for 30-60 minutes.
- When ready to bake, preheat oven to 325° and position your rack in the middle of the oven.
- After chilling dough, scoop out a few tablespoons of dough and roll them into about 1 inch balls. Place the dough balls onto the lined baking tray, spaced out evenly.
- Using the handle end of a wooden spatula, or your finger, make a well in the center of each cookie dough ball. Make sure it’s deep, but don’t poke a hole all the way through. You also don’t want the well to be too wide.
- To each cookie well, add a generous amount of raspberry preserves. You can use a small spoon to do this or a piping bag if it’s easier.
- Bake the jam-filled cookies for about 20-25 minutes or until they’re golden brown, and they’ve puffed up. Let the cookies cool on the baking tray for 5 minutes before transferring them to a cooling rack to cool completely. Once they’re completely cooled, you can add an extra dusting of powdered sugar to the cookies if you’d like. Serve, and enjoy!
Notes
Nutrition
The nutrition facts provided are calculated using a third-party tool and are estimates only. Actual nutritional content may vary based on the ingredients and brands you use, as well as portion sizes. For accurate results, please consult a registered dietitian or nutritionist.
Want To Save This Recipe For Later?

Meet Christi, Love From The Oven
I’m Christi I love sharing easy & delicious recipes that your family & friends will love. I’m a mom, baker, cookbook author and lover of sprinkles.