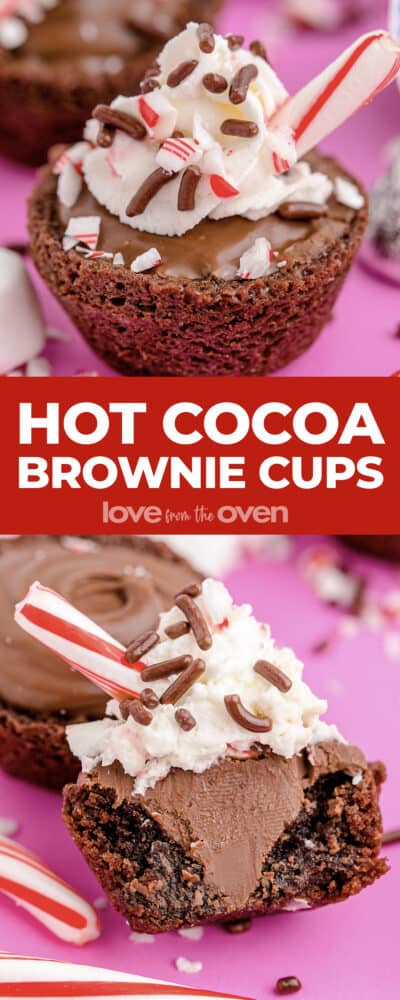
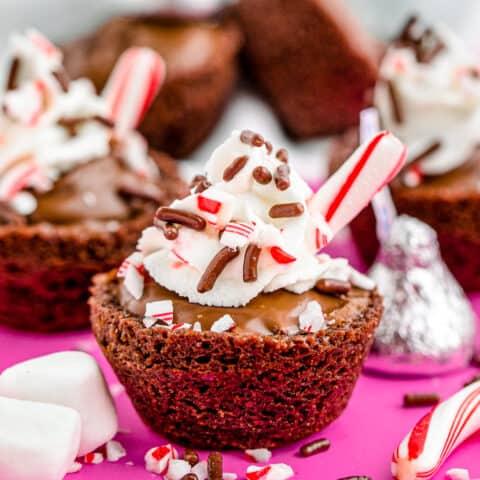
Hot Chocolate Brownie Cups are an adorably sweet treat that are perfect for the holiday season. You will be surprised how easy these cute brownie bites are to make. Made with either your favorite brownie mix or homemade brownies recipe, these little show stoppers will be a big hit with your friends and family!
Want To Save This Recipe For Later?
Reasons You’ll Love This Recipe
If you are looking for something a little more fun or festive than your standard Christmas Cookies, these brownie cups are the perfect choice.
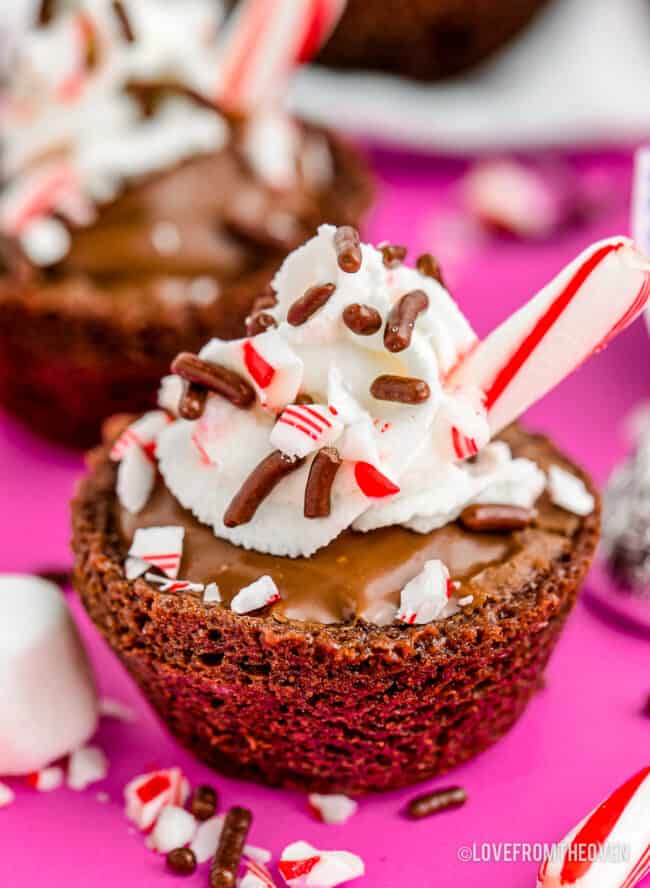
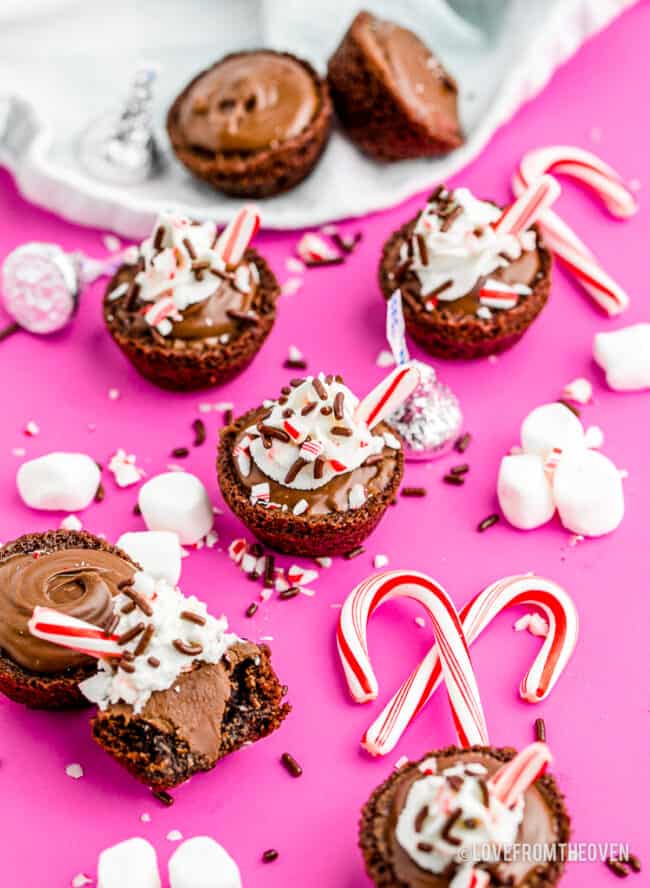
Your friends and family will be impressed with the adorable presentation of these brownie bites. They look like sweet little mugs of hot cocoa!
They are quickly made using either a box brownie mix or your favorite brownie recipe.
Perfect for holiday parties, it’s a great option when you want to make or bring something that’s easy, but a little different than the rest.
Filled with Hershey’s Kisses, you can get creative with the holiday flavors Hershey’s puts out.
Hot Chocolate Brownie Cups
During the busy holiday season, I’m always looking for easy ways to make cute treats. Sure, I love a good chocolate chip cookie, but the holidays are the perfect time of year to dress up dessert a bit more. It doesn’t get much cuter than these Hot Chocolate Brownie Cups. They are downright adorable, but they are SUPER easy to make.
Let’s discuss the ingredients you’ll need, and the steps you’ll take, to make these darling hot chocolate brownie cups. If you want to skip my discussion, tips and answers to frequently asked questions, just scroll to the bottom for the printable recipe.
Ingredients
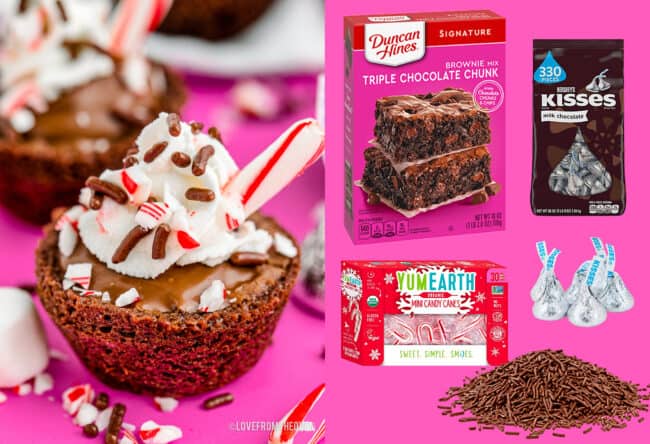
- Brownie mix and ingredients required on box, or your favorite brownie recipe – This is my top choice for homemade brownies. If using a mix, look for one that makes a 9×9 inch size pan, not a 9×13 size. Take note that the size of packages can vary slightly, and you may end up with slightly more batter than your pan holds. You can always do another batch with this batter after the first one finishes. Tip: for the best box brownies, check out my Doctored Brownie Mix information.
- Chocolate kisses – Have fun with this one, with so many seasonal flavored Hershey’s Kisses, you can have fun with it. I love using the Special Dark Kisses or the will paired Hot Cocoa Kisses!
- Heavy cream – Since you’ll be making a homemade whipped cream, this isn’t one you can really substitute. Heavy cream or heavy whipping cream is located near the half and half and milk in the grocer’s dairy section.
- Powdered sugar – Also called confectioners sugar. If yours seems to have a lot of lumps, give it a quick sifting.
- Instant white chocolate pudding mix – This pudding helps you stabilize the whipped cream so that it doesn’t melt so quickly and easily. If you can’t find white chocolate, you can use vanilla or cheesecake flavor, they just might give the whipped cream a bit more of a cream color.
- Mini Candy Canes – Miniature candy canes are much easier to break into pieces to use with this recipe.
- Optional Garnishes – You can garnish with sprinkles, mini marshmallows, chocolate sauce, whatever you like!
Directions
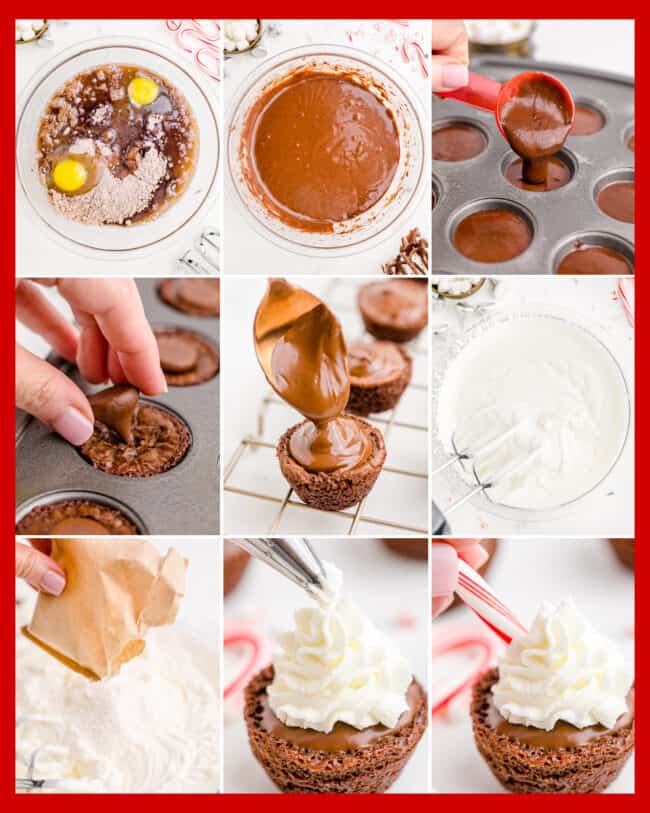
- Preheat the oven to 350 degrees farenheit.
- Prepare a 24 mini muffin pan by spraying with a baking spray that includes flour.
- Prepare the brownie mix according to the package directions, or follow recipe directions.
- Fill mini muffin cups ⅔ full.
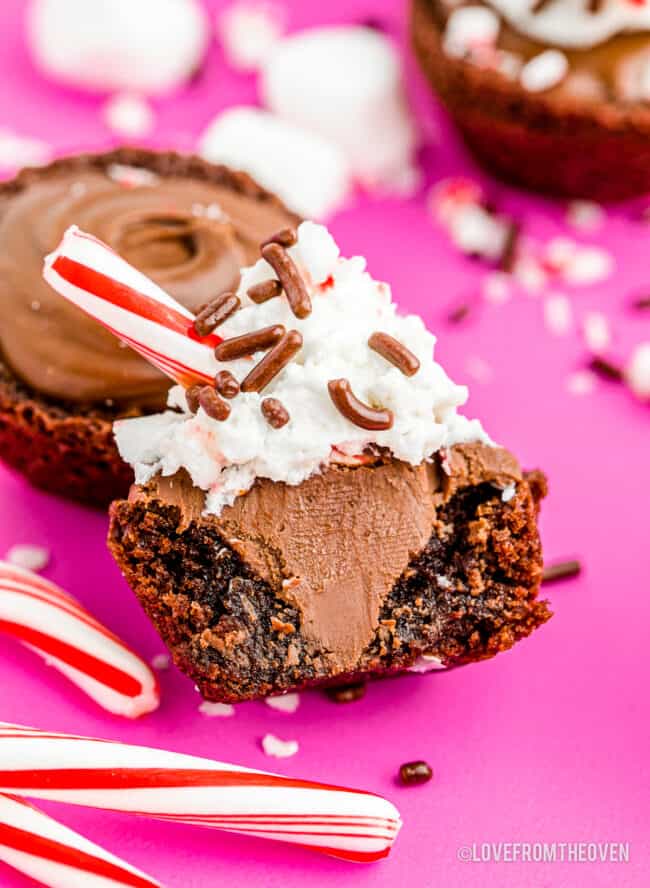
- Bake for 7-10 minutes or until the edges are set but the centers are still soft, not liquid.
- As soon as you remove them from the oven, press one kiss into each brownie cup with the pointed down, flat part on top. You can leave them as is or as soon as they begin to melt and soften you can use a thin spatula or a spoon to smooth out the chocolate and make it look more like cocoa!
- If you would like additional chocolate topping as shown, melt some extra Hershey Kisses and spoon the melted chocolate on to the top of the brownies.
- Allow the brownie cups to cool completely then transfer them to a cooling rack.
- While they are cooling, prepare the stabilized whipped cream.
- Whip the heavy cream at high speed in a very cold bowl until it starts to thicken. Add the powdered sugar and continue beating until soft peaks will form. Next, add the mix and beat until stiff peaks form. Watch it carefully, as this can happen quickly. Don’t want to overmix or it will curdle.
- When the brownies are fully cooled you may pipe on the stabilized whipped cream. Garnish with mini marshmallows, pieces of peppermint sticks, sprinkles and chocolate sauce if desired.
Storage
Once topped with whipped cream, store covered in the fridge. If brownies have not been topped, they can be stored at room temperature for up to five days. If you will be serving them more than a day later, I prefer to wait and top them with whipped cream the day that I serve them.

More Brownie Recipes
If you love these Hot Chocolate Brownie Cups, make sure to try some of my other brownie recipes.
- Pecan Pie Brownies combine two classic desserts into one easy treat!
- Use holiday flavored M&Ms in my M&M Brownies for a festive touch.
- Get nostalgic with my Cosmic Brownies.
- Nobody will know you started with a mix when you use my tips for the best Doctored Brownie Mix.
- While not a brownie, these Brownie Cups look adorable on a dessert tray with Christmas Tree Sugar Cookies.
- These delicious little Brownie Bites are perfect for any occasion!
I love to hear from readers like you! If you’ve tried this, please leave a comment and review below. If you have photos, tag me @lovefromtheoven #lftorecipes on Instagram and Pinterest. Thanks!
Hot Chocolate Brownie Cups
Equipment
- Mini Muffin Pan
Ingredients
- 1 package brownie mix or your favorite brownie recipe
- 24 Chocolate Kisses
- 2 cups heavy whipping cream
- 2 tablespoons powdered sugar
- 2 tablespoons instant white chocolate pudding mix (use the dry mix, do not make the pudding)
- Optional Garnish: candy canes, mini marshmallows, chocolate sprinkles, chocolate sauce
Instructions
- Preheat the oven to 350 degrees fahrenheit. Prepare a 24 mini muffin pan by spraying with a baking spray that includes flour.
- Prepare the brownie mix according to the package directions, or follow recipe directions. Fill mini muffin cups ⅔ full.
- Bake for 7-10 minutes or until the edges are set but the centers are still soft, but not liquid.
- As soon as you remove them from the oven, press one kiss into each brownie cup with the pointed down, flat part on top. You can leave them as is or as soon as they begin to melt and soften you can use a thin spatula or a spoon to smooth out the chocolate and make it look more like cocoa!*
- Allow the brownie cups to cool completely then transfer them to a cooling rack. While they are cooling, prepare the stabilized whipped cream.
- Whip the heavy cream at high speed in a very cold bowl until it starts to thicken. Add the powdered sugar and continue beating until soft peaks will form. Next, add the mix and beat until stiff peaks form. Watch it carefully, as this can happen quickly. Don’t want to overmix or it will curdle.
- When the brownies are fully cooled you may pipe on the stabilized whipped cream. Garnish with mini marshmallows, pieces of peppermint sticks, sprinkles and chocolate sauce if desired.
Notes
Nutrition
The nutrition facts provided are calculated using a third-party tool and are estimates only. Actual nutritional content may vary based on the ingredients and brands you use, as well as portion sizes. For accurate results, please consult a registered dietitian or nutritionist.
Want To Save This Recipe For Later?

Meet Christi, Love From The Oven
I’m Christi I love sharing easy & delicious recipes that your family & friends will love. I’m a mom, baker, cookbook author and lover of sprinkles.